Chill out man
The journey of creating a proper brewing setup begins (and continues) with various pipes popping off and blasting your face with water, cartoon-style, before you eventually end up with something that works and doesn’t fill your garage with water.
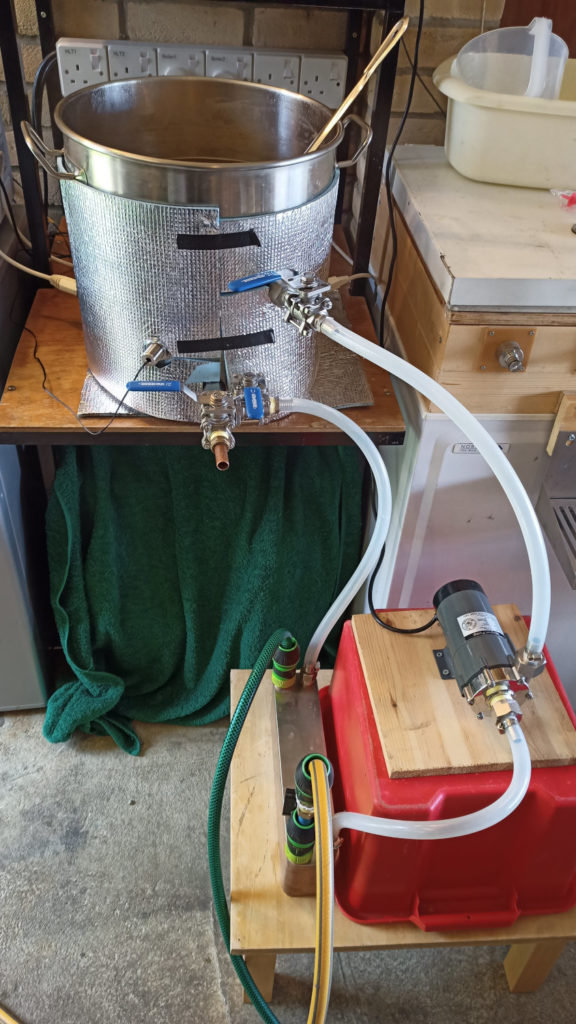
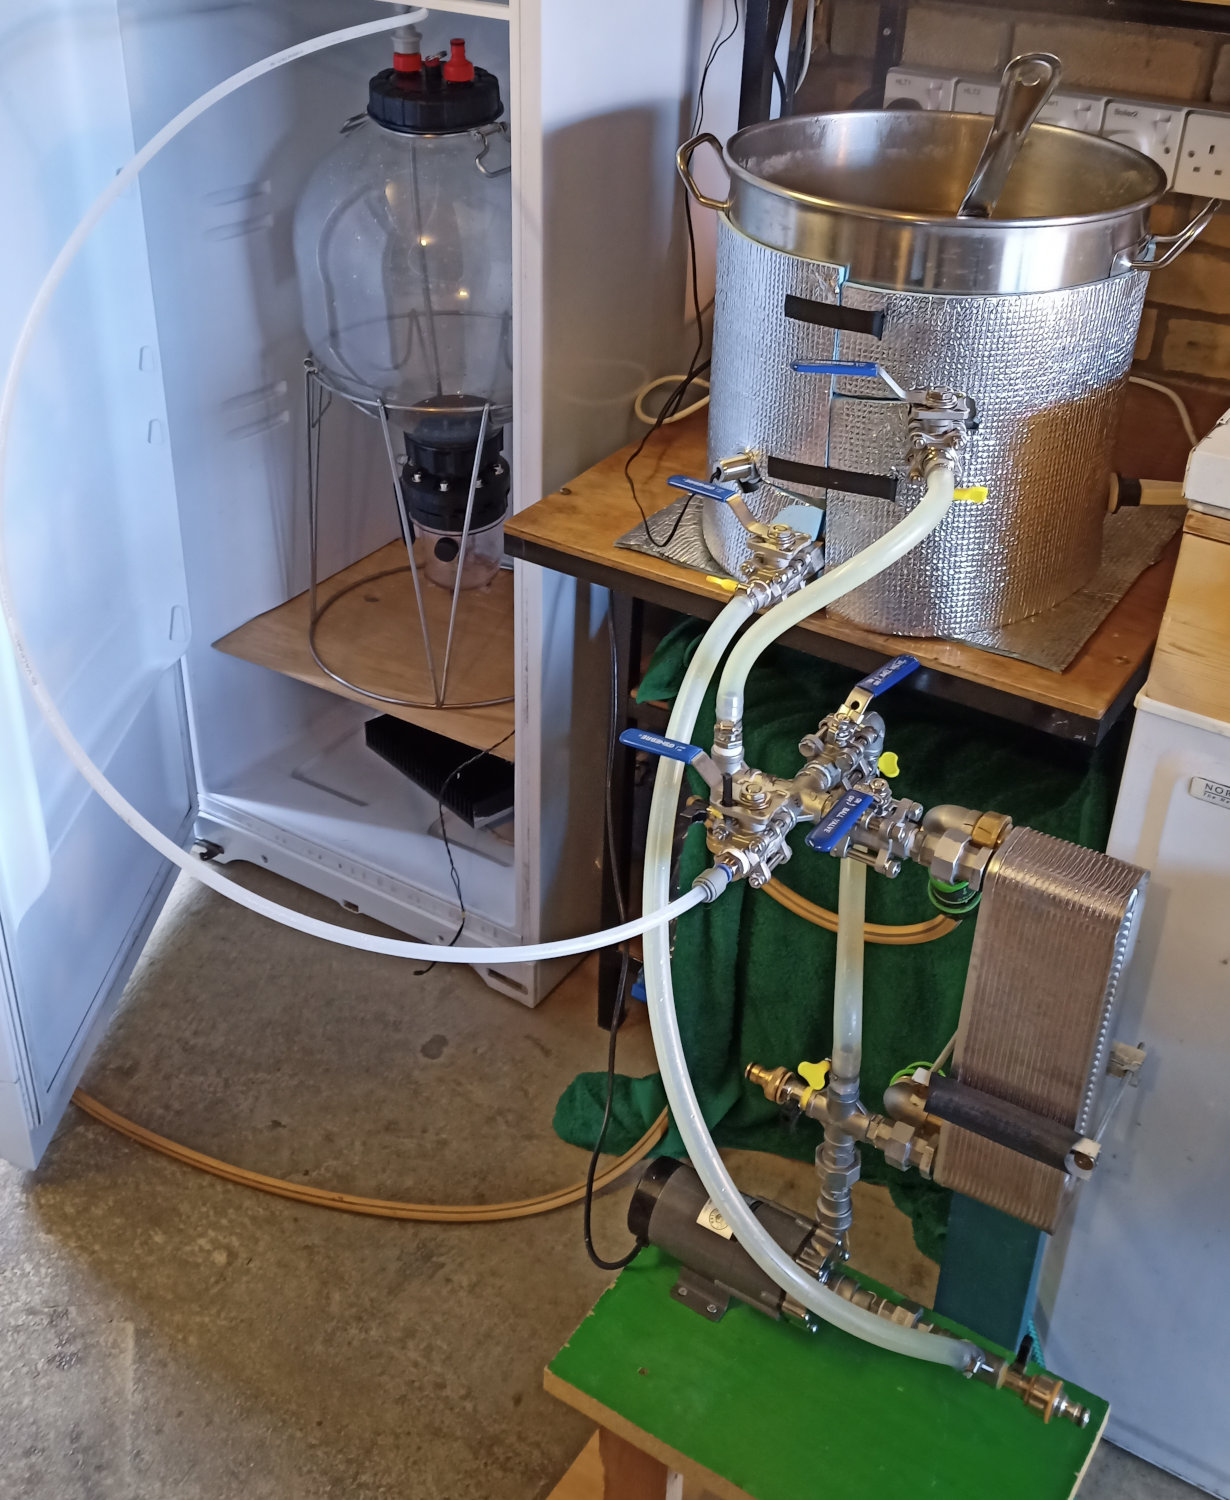
The horrible mess in that picture is what I actually tried to use for my first brew with a plate chiller. It did such a terrible job that it prompted me to spend 3 months doing it properly. If your set up looks anything like that you might want to read on.
The setup shown here is pretty typical from what I’ve seen on YT videos. It takes the wort from the outlet at the bottom, runs it through the chiller, on to the pump, and then out to the whirlpool outlet at the top. Other than just looking plain nasty, there are a number of things wrong with it:
- Each silicon pipe held on with jubilee clip is a time bomb, waiting for you to forget to tighten it up.
- The chiller is sitting on its back, which is inefficient, and means you end up with a chiller full of wort at the end of the brew.
- The pump is higher than the chiller. It’s not self-priming so you have to fill up the chiller first before you can start pumping.
- Bump into the table and all that stuff goes on the floor, probably pulling off a pipe or two before putting a dent in your chiller.
- You have to disconnect and reattach pipes when you want to change the configuration, like if you want to pump out to a conical fermenter. Each disconnect is another splash of wort on the floor. Forget to turn a tap off first and it’s a splash and a gush.
- Cleaning it will be a pain because of all those silicon pipes flobbling everywhere. Poke them in a bucket to circulate cleaning solution and as soon as your back is turned at least one will flibbit out and start spraying everywhere.
- “Flobbling” and “flibbit” are apparently already words in the Urban Dictionary with utterly disgusting meanings.
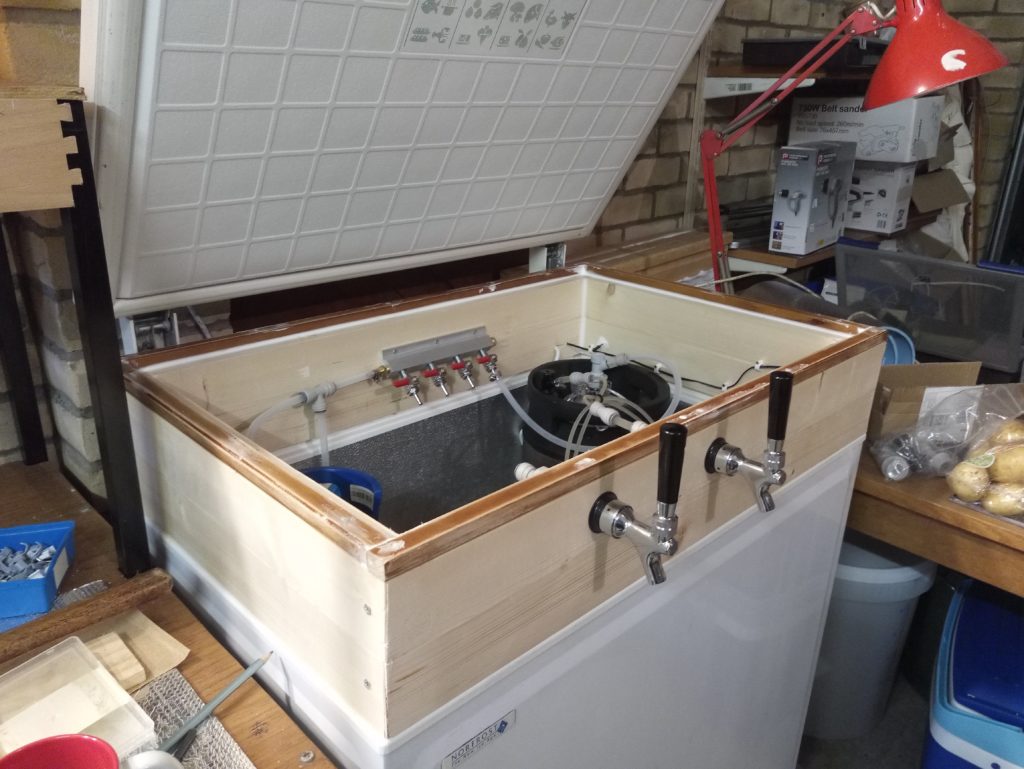
So, enough wibbling, here is my solution:
If you are thinking “that still looks pretty shit”, then you would be right, but it works better than it looks. From whirlpool to chilling to pumping out to cleaning, you don’t need to keep disconnecting stuff, thanks to all those valves. This is a diagram of what it is:
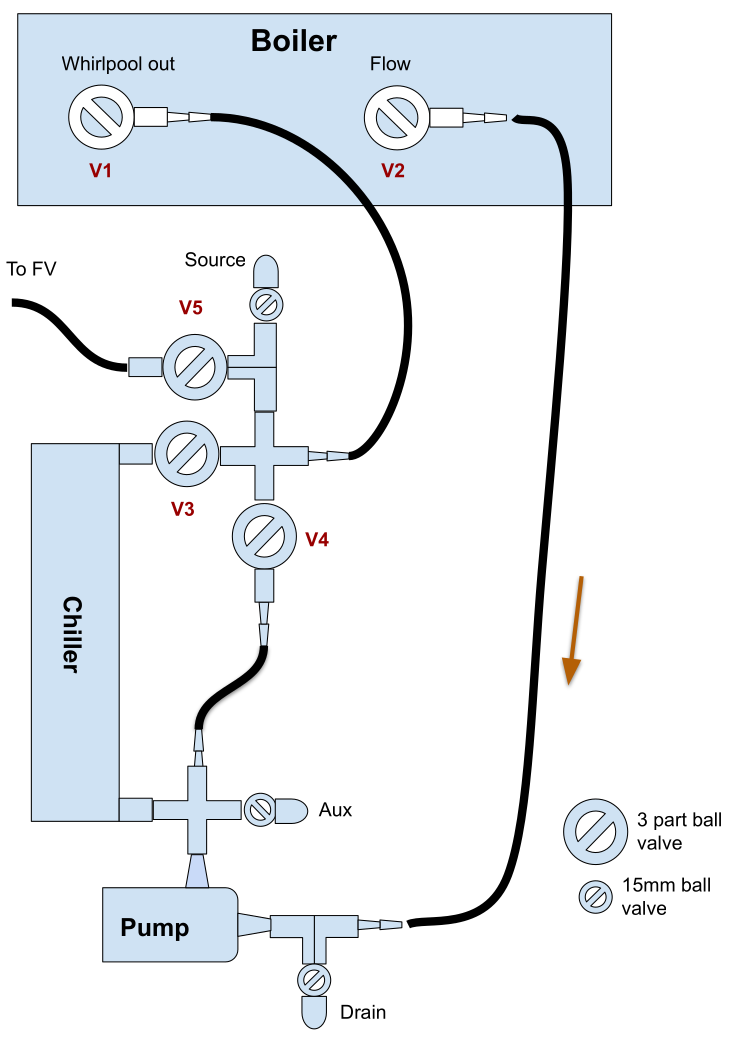
Before we get into how it works, let’s talk valves. It uses two different types: expensive 3 part ball valves and cheap as chips 15mm compression fitting valves. Did you know that the thread on a 15mm compression fitting is 1/2 BSP? It fits into a stainless 1/2 BSP female thread (as long as it’s not tapered), and that can lead to all sorts of fun and bodgery, as long as you use enough PTFE tape. I might do a separate post on plumbing fittings because they are a nightmare of unexpected incompatibility and unexpected compatibility.
Anyway, basically – expensive 3 part fittings are for passing wort through so they can be disassembled, and cheapo 15mm ball valves are for flushing with water and cleaning. Wort never goes through the 15mm ones, so they don’t need to be taken apart when you do a deep clean. Almost all the other parts are stainless 1/2 BSP fittings, which aren’t cheap but are pretty bullet proof.
Other features are:
- The pump is at the bottom for easier priming.
- The chiller is mounted vertically for more efficiency and easier draining.
- Draining and cleaning ports have Hozelock connectors on them for cheap and easy connecting to hosepipes.
- It’s all mounted on a sturdy wooden frame so bits don’t fall over.
- There is a dedicated line to the FV so no fiddling with pipes. It’s essentially a sealed system to stop contamination.
- You can whirlpool without the chiller being inline, so it doesn’t get clogged up with bits of hops before the hop cone forms.
How to use
So your boil is going to finish soon. First thing is to sterilise the equipment by running the boiling wort through it. Don’t start the cooling water yet. Open V1, V2 and V4 and wait for the pump to fill up and turn it on. You can speed up the process by pulsing the pump to shake the bubbles out.
Leave it running for a minute or two to get the hops whirlpooled towards the centre of the boiler. Then slowly open up V3 to start running the wort through the chiller. Do it slowly because it’s full of air and you’ll get big bloikking bubbles in your boiling wort. When the bubbles have stopped close V4 so it’s just circulating through the chiller.
Give it a few more minutes and then turn on the cooling water. Start off with a high flow rate and turn it down as the wort cools.
When you are down to temperature, close V1 and open V5 and pump her out! You will end up with some wort left in the chiller and pump but it’s only a few 100 ml, so I don’t worry about it.
How to clean
The Desplashinator 3000000 makes cleaning fun! If you are weird. I find it fun and I’m pretty weird. Just connect a hose to the drain valve connector, then open up all the 3 piece valves and the drain valve to empty the system – I empty it down a drain in the floor. It has to be lower than the system, obviously.
Stick a hosepipe connected to mains water on the source valve connector, close V1, V2, V3, and V5 and leave V4 open. This flushes the pump out backwards to get rid of bits of hop that might have caught in it. Then close V4 and open V3 to flush the chiller out backwards. You could probably do away with the “Aux” valve and connector because I never use it.
Clean out the boiler, put 5 litres or so of cleaner in it and reconnect it back to the chiller system. Then leave it circulating for a while before flushing with clean water. You can fill up the boiler through the source valve and V1 and flush with that out of the drain valve.
Conclusion
This is so much better than having it on a table and connecting everything with silicon tubing. It was a lot of effort to build, but totally worth it.
Next up: instructions for how to build one.