Geek

Using the Google Calendar API from your web site with PHP

This post is mainly to remind myself how to do this when I inevitably forget in a year or two and want to integrate data from a Google Calendar into a project. There are quite a few steps, but it’s pretty straightforward once you know what to do. As with most programming, there are many other ways of acheiving the same thing, but I won’t be exploring any of them, other than the one that worked for me. All the information here is already out there, but it’s broken into pieces – I couldn’t find any posts showing how to do the whole process from start to finish. So I wrote this.

This presumes you have a Google account and a calendar set up on Google Calendar with events on it which you want to read from a PHP application on a web site. You also need to have a shell account on your server1.

You will see how to set up a project containing a service account, how to set up authorisation for the service account to retrieve the Calendar data for your web page, and how to set up your web site using PHP to access your calendar using the service account.

Setting up the service account

The service account is like a robot user that accesses Google services on behalf of your web site. It has an email address and an ID, and can log in to Google services using a public/private key pair. Your service account has to belong to a project, and each project can contain multiple service accounts. You can have up to 12 free projects, so it’s probably best to create a new one for your calendar data slurper.

  1. Go to https://console.cloud.google.com and log in if necessary. Click on the 3-dot logo / pull down menu at the top to open the “Select a project” box. Click on “Add new project” or, if you already have one you are going to use, select it here and go to step 3.
  2. Give your project a name and see if the “Project ID” is to your liking. I called mine “Testy test”. Click “Create”.
  3. From here on I’m calling the project “Testy test”. You might want to call yours something a bit less stupid.
  4. If the page doesn’t say “Welcome. You are working in Testy test.”, select the project, either from the notifications drop down, or by clicking the 3-dot logo.
  5. Click on the “IAM & Admin” quick access button or select it from the navigation menu on the left. The page will show you as being the principle for the project “Testy test” but not much else. Click on “Service Accounts” on the left navigation pane to bring up an empty list of service accounts belonging to the project.
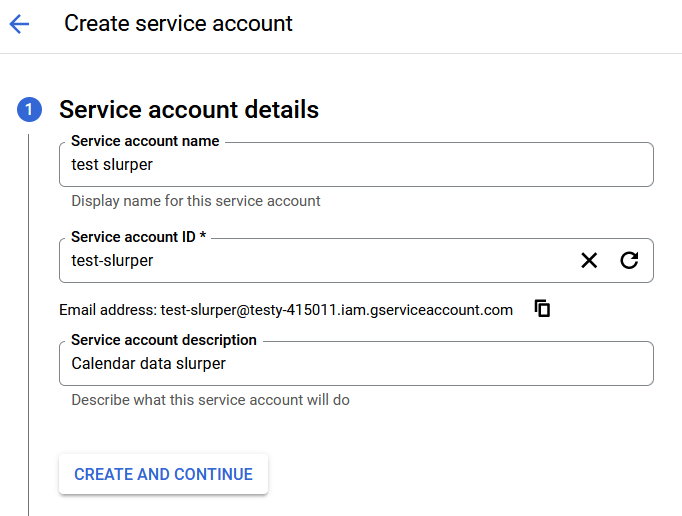
  6. Click “+ CREATE SERVICE ACCOUNT” to go to the next page, which has 3 steps to creating it. First, give your service account a name and description:
  7. Make a note of the email address. You will need it later when you share the calendar with your service account. Click “CREATE AND CONTINUE”.
  8. Skip the next two optional steps.
  9. You will now be back at the service account list, with your newly created account showing:
  10. You now want to set up authorisation for your service account by creating keys so it can access APIs. Click on the “Actions” dots and choose “Manage keys”. You will go to a page with an empty list of keys for that service.
  11. Click on “ADD KEY” and choose “Create new key”.
  12. Make sure that “JSON” is selected and choose “CREATE”. Your browser will automatically download a file containing your private key. Upload this file to somewhere safe on your server. This is your private key and has to be accessible to your PHP script but must not be kept anywhere accessible by your web server. On a Linux system, keep it somewhere off your home directory, not your web root (usually public_html) directory. This is really important, so much so that the word “not” is not only bold, but red as well. You have to keep this key private.
  13. You now need to enable the Calendar API for your project. Click on “APIs & Services” in the quick links box of the “Welcome” page or the left menu. Click on “+ ENABLE APIS AND SERVICES”.
  14. Do a search for “Calendar” and click on the result that says “Google Calendar API”.
  15. Click on the “Enable” button and you will be taken to the entry for the Calendar API off the “Enabled APIs and Services” page, showing stats for that API.

Your service account is now ready to go.

Setting up your web server with the PHP for using the API

You now need to download the PHP scripts to for use with the Google API. Well, you don’t NEED to, you could write it all yourself, and there is information out there on how to do it. But anyone sane would just use the scripts that Google provide for free.

  1. The easiest way to install the scripts you need for PHP is to use Composer. This is an installer which works in a similar way to Apt. Follow the instructions on this page to install it.
  2. Install the Google API PHP files by using this command in your web site’s root directory:
    composer require google/apiclient:^2.15.0

Now you are ready to start using the calendar API.

Allowing the service account to access your calendar

Before you can access the calendar from your PHP pages, you need to share it with your service account.

  1. Start Calendar in a web browser and click on the burger of the calender you want to use in the “My calendars” section and choose “Settings”:
  2. Scroll down to the “Share with specific people or groups” section and click “Add people and groups”.
  3. Remember part 7 of setting up the service account? Where I said make a note of the email address? Yup. That’s what you put in the “Add email or name” box. Make sure the “See all event details” is chosen and then click “Send”. If you want your PHP script to be able to alter the calendar you need to choose another option that allows it. Only grant permissions that are necessary.
  4. Scroll down to the “Integrate calendar” section and make a note of the Calendar ID. It looks something like “qhhbdvqi5dom44arse60oav68k@group.calendar.google.com”.
  5. It’s at this point that I wish I had read the documentation a bit more closely and seen this:

Note: Sharing a calendar with a user no longer automatically inserts the calendar into their CalendarList. If you want the user to see and interact with the shared calendar, you need to call the CalendarList: insert() method.

Read that again. It’s important. I spent literally hours trying to find out why the API couldn’t see the calendar. Hours wasted because I didn’t read a paragraph of text. Anyway I’m not bitter, as you can tell.

Hitting the PHP

There doesn’t seem to be a way to insert a calendar into the service account’s calendar list from the admin console, so you need to run the following code on your server. Download it here – right click on that link and choose “Save link as…”

<?php
require_once __DIR__.'/vendor/autoload.php';

if ($argc < 2) {
    echo "Supply the calendar name as an argument\n";
    exit;
}

$calendarId = $argv[1];

$client = new Google_Client();
$client->setAuthConfig('/path/to/credentials.json');

$client->setScopes('https://www.googleapis.com/auth/calendar');
$client->setApplicationName("My Calendar");

$service = new Google_Service_Calendar($client); 

$calendarListEntry = new Google_Service_Calendar_CalendarListEntry();
$calendarListEntry->setId($calendarId);

$service->calendarList->insert($calendarListEntry);

$calendarList = $service->calendarList->listCalendarList();

while(true) {
  foreach ($calendarList->getItems() as $calendarListEntry) {
    echo $calendarListEntry->getSummary() . "\n";
  }
  $pageToken = $calendarList->getNextPageToken();
  if ($pageToken) {
    $optParams = array('pageToken' => $pageToken);
    $calendarList = $service->calendarList->listCalendarList($optParams);
  } else {
    break;
  }
}
?>

Edit the highlighted parts with your path to the keys file (step 11 of setting up the service account) and change the application name if you want to. Then run the script from the command line with:

naich:~$ php add_calendar.php qhhbdvqi5dom44arse60oav68k@group.calendar.google.com

Obviously change the calendar ID to the one you want to use (step 4 of allowing the service access to your calendar). If all goes well you should see the name of the calendar you have added along with the other calendars (if any) that have been added to that service account already. If not you will see lines of error messages. Make sure you have followed all the steps in “Allowing the service to access your calendar”.

Your service account is now ready for your scripts to use.

Getting started

https://developers.google.com/calendar has information about using the calendar API and the examples (e.g. in this tutorial) usually have PHP versions. The examples assume you have already set up a service in your PHP script – something like this:

require_once __DIR__.'/vendor/autoload.php';

$calendarId = "qhhbdvqi5dom44arse60oav68k@group.calendar.google.com";

$client = new Google_Client();
$client->setAuthConfig('/path/to/credentials.json');

$client->setScopes('https://www.googleapis.com/auth/calendar');
$client->setApplicationName("Calendar");

$service = new Google_Service_Calendar($client);

There is a list of Google_Service_Calendar methods which is confusing as hell to me. If you use the links on the left with “_Resource” at the end you get a list of functions for that class. So, for example, the Google_Service_Calendar_Events_Resource page shows how to get a list of events for a calendar. The code would be:

$events = $service->events->listEvents($calendarId);

Follow the link in the “Returns” section to see how to use the $events class. Something like:

  foreach ($events->getItems() as $event) {
    $name = $event->getSummary();
    $startDate = $event->getStart()->getDate();
    $endDate = $event->getEnd()->getDate();

And so on. Basically you need to do a lot of reading of documents, which is where I’ll leave you now.

Good luck!

  1. I think that in theory you could do all this on a hosted account, but it would not be straightforward to keep the private key secure if you can only access space that is readable by the web server. You would also have to install the Google PHP APIs manually. ↩︎

About: beaks.live – the software

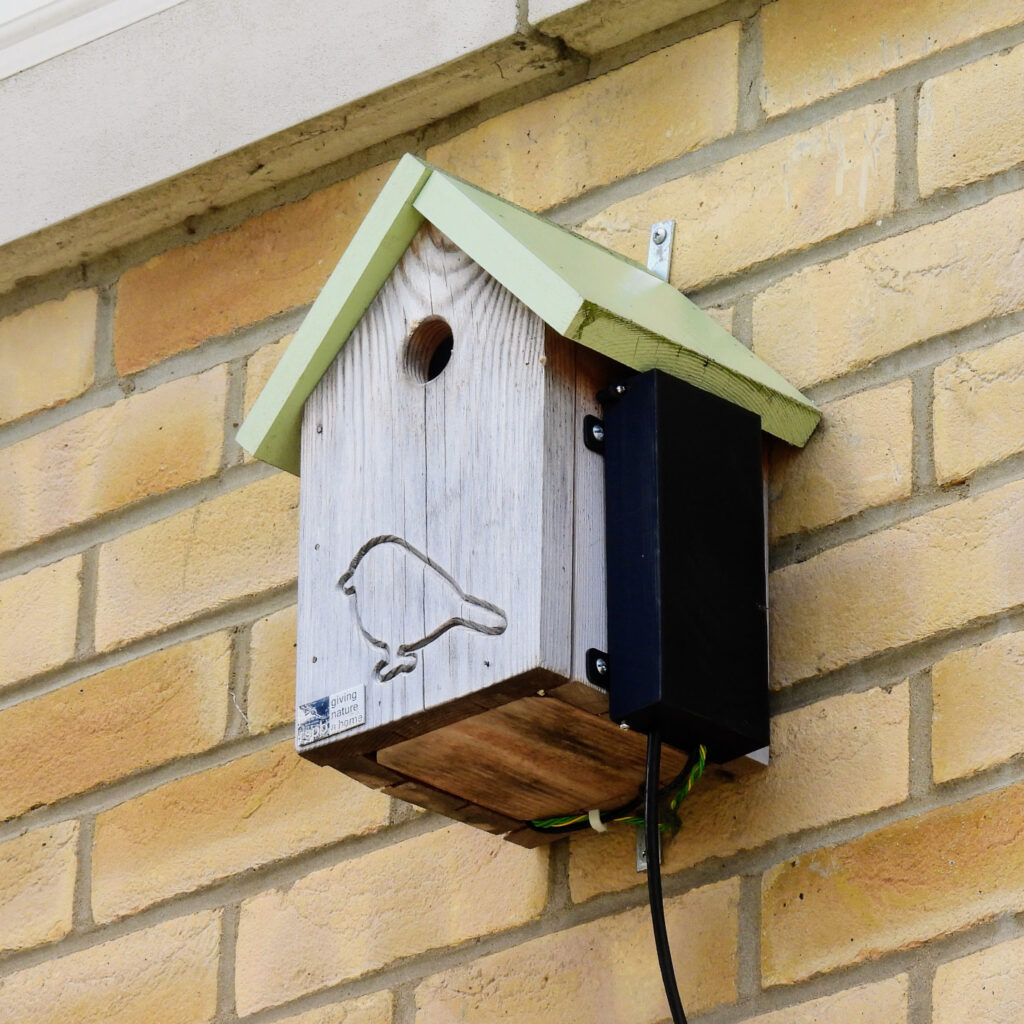
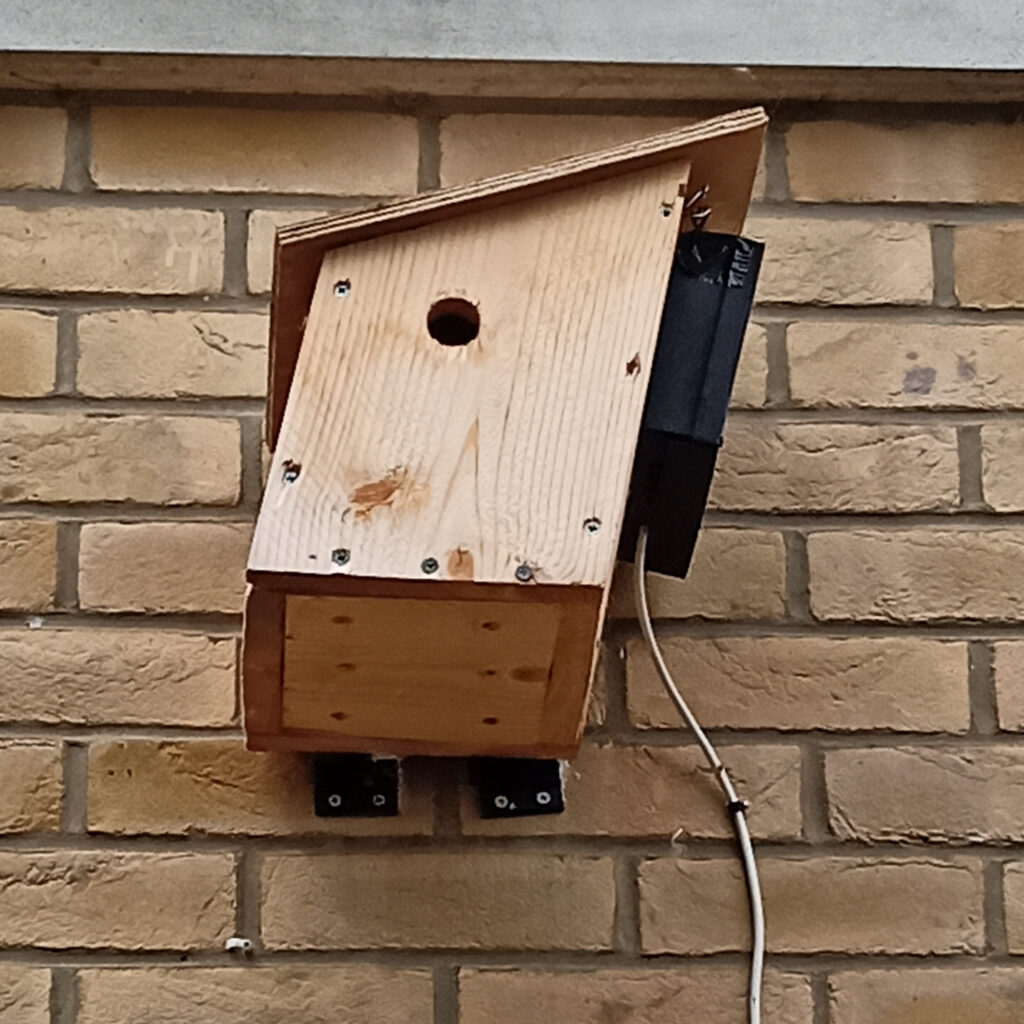
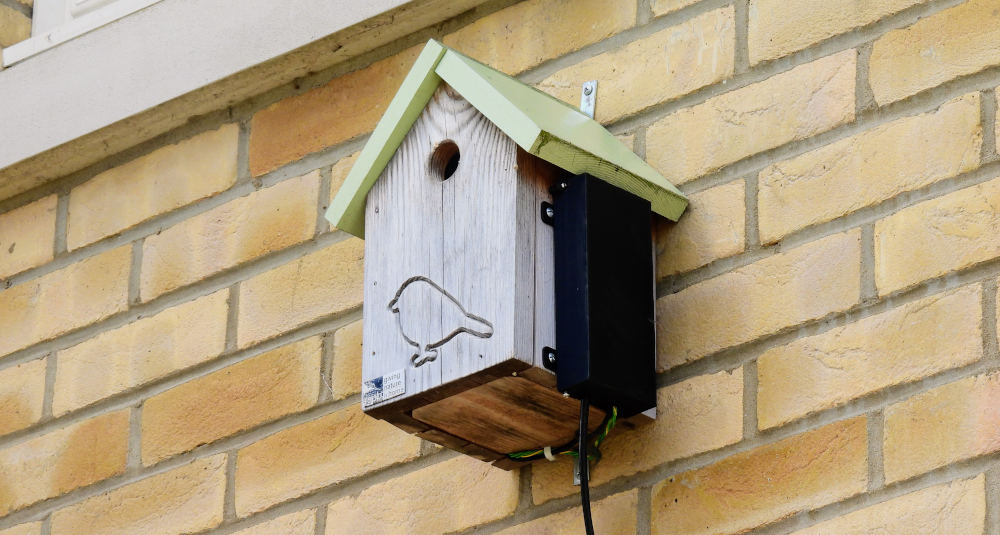
This is the bird box that is shown at beaks.live. It is on the side of a house in Cambourne, about 8 miles west of Cambridge, in the UK.

Right from the start, the plan was to get it working roughly and quickly and then improve it until it was the best I could do with the crap hardware – this being a £11 webcam connected via USB to a Raspberry Pi 4, which also drives transistors to work the cheapest infra-red LEDs I could find.

Having messed around with RTMP (no one uses it any more) and HLS (I’ll be fucked if I can get it to work) for streaming, I eventually ended up with this system:

The Raspberry Pi takes care of the camera and lighting, uploading the video to the server (a VDS hosted with Mythic Beasts), which does all the heavy lifting of looking for motion and streaming live footage to the many dozens of viewers who are eager to catch a glimpse of beak.

Did I mention the camera is crap? The automatic exposure sets itself to some random level and occasionally flashes up and down twice a second, apparently to relieve the boredom. So the R-Pi has to sort out the exposure, and luckily, you can set most of the camera settings manually via USB. Every 10 minutes the Pi records 5 seconds of video, takes 5 frames and averages the light level on each of them. It then sets the exposure, gamma, and LED levels* depending on whether it needs to be lighter or darker. Or it just leaves things as they are if it’s all hunky dory.

* the LEDs are so dim I just leave them all on all the time now.

It records 5 minutes of video at a time, using FFmpeg (with some video tweaking and normalisation to make the crap camera’s video a bit nicer), which is then uploaded to the server. Funny story – I originally set up the Pi’s exposure setting software so it calculated the camera’s exposure settings from this video – this video which has been normalised. So whatever is coming out of the camera, FFmpeg “fixes” it, and then exposure setting software thinks everything is hunky dory, despite the exposure being so wrong the video is just noise. This is why it records 5 seconds of unfixed video separately to check the exposure. A couple of months later I had forgotten this, and had the brilliant idea of using samples from the 5 minute feed rather than doing a separate 5 second one. I thought the camera had died, until I remembered the normalisation and why I didn’t do it like that originally. I look forward to doing the same thing again in July, September, November, etc.

Incidentally, all this software is written in a mixture of Python and Bash scripting because I am a masochistic lunatic. I love Bash – it’s just mad, with random shit like functions looking like “function my_function () { …” where the ()’s do nothing because you can’t put anything inside them – they are purely decorative.

But I digress. The server has the latest video uploaded to it. It keeps the last 4 uploads so there is 20 minutes of buffer. It deletes the oldest one once it has been processed for motion detection. There is a watchdog timer on the server and the Pi will only upload a video if it’s been updated recently enough. This is to stop the server being filled up with files if it reboots and the processing stops or something. Each 5 minutes is about 100MB.

The motion detection is done with DVR-Scan and hits are processed to generate thumbnails and a static web page. Anything less than 30 seconds long is discarded to get rid of most of the dross. Videos older than 25 hours are deleted so there’s a rolling list of videos.

The live page is also static and uses video.js for the player. The current 5 minute chunk location is obtained using an XMLHttpRequest, then the video loaded with JS. When it gets to the end, the JS gets the next section and plays it with a minor blip for the viewer.

The “live” video is actually always 10-15 minutes in the past because it takes 5 minutes to record a chunk before it’s uploaded and then the server tells the player to play the previously uploaded one so you don’t start watching one that’s still uploading.

It’s a bit like the HLS streaming system, except there’s hideous latency and mine works. If you want to mess it up, right click and choose “show all controls” and then slide the slider to the end. I’ve no idea why I’ve told you that.

About: beaks.live – the hardware

This is the bird box that is shown at beaks.live. It is on the side of a house in Cambourne, about 8 miles west of Cambridge, in the UK.

When I put a camera in this bird box last year, I was not optimistic. Expecting to capture nothing more than the inside of an empty box, there didn’t seem much point in spending any significant sum of money on a camera. I decided to see how well I could get it working for how little money.

Two cameras for £21.66 doesn’t scream quality, but they are able to manually focus down to a few cm. Being cheap and nasty also means they won’t have an infra-red filter on the lens, which means I can illuminate the box at night with a light the beaks can’t see.

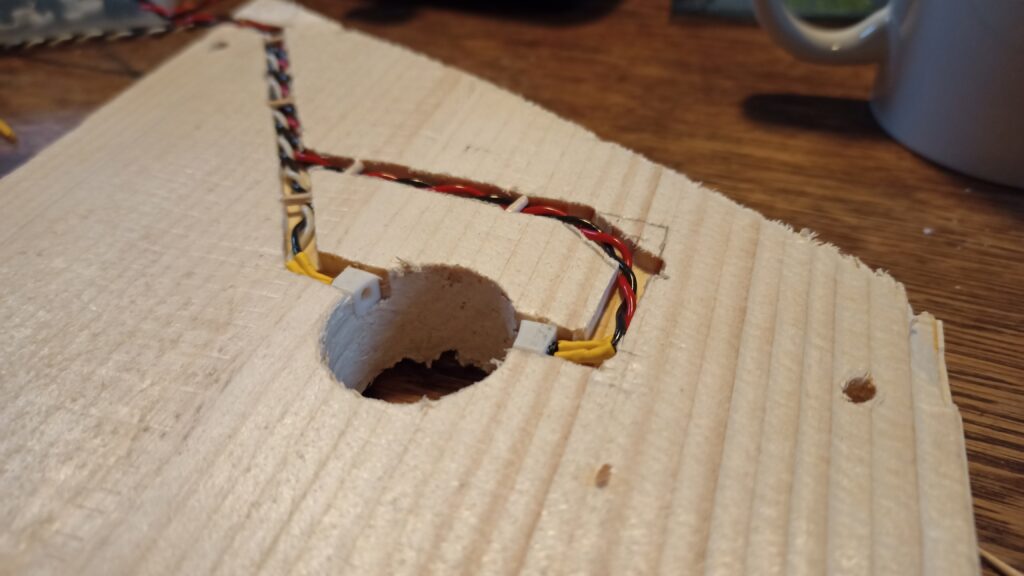
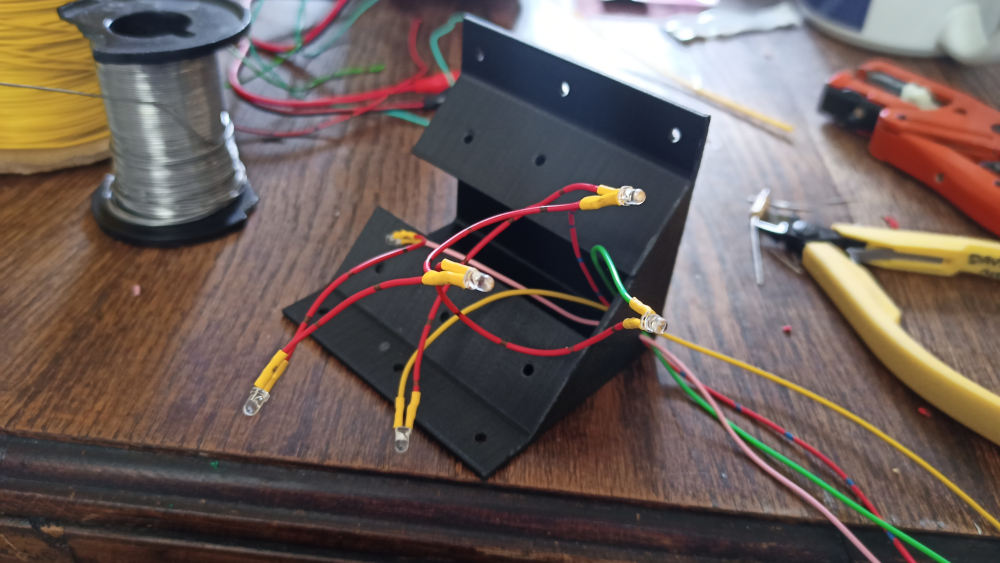
I picked one and sawed off the mounting at the bottom, knocked up a 3d printed housing to fit it in the apex of the bird box roof, and fitted some cheap Ebay IR LEDs.

A mess of wires being put into the 3d printed camera mount.
Cheap and nasty does it every time

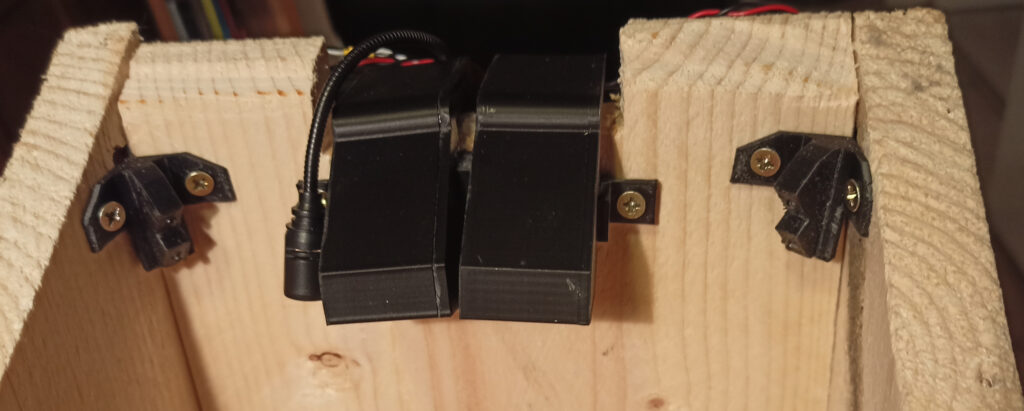
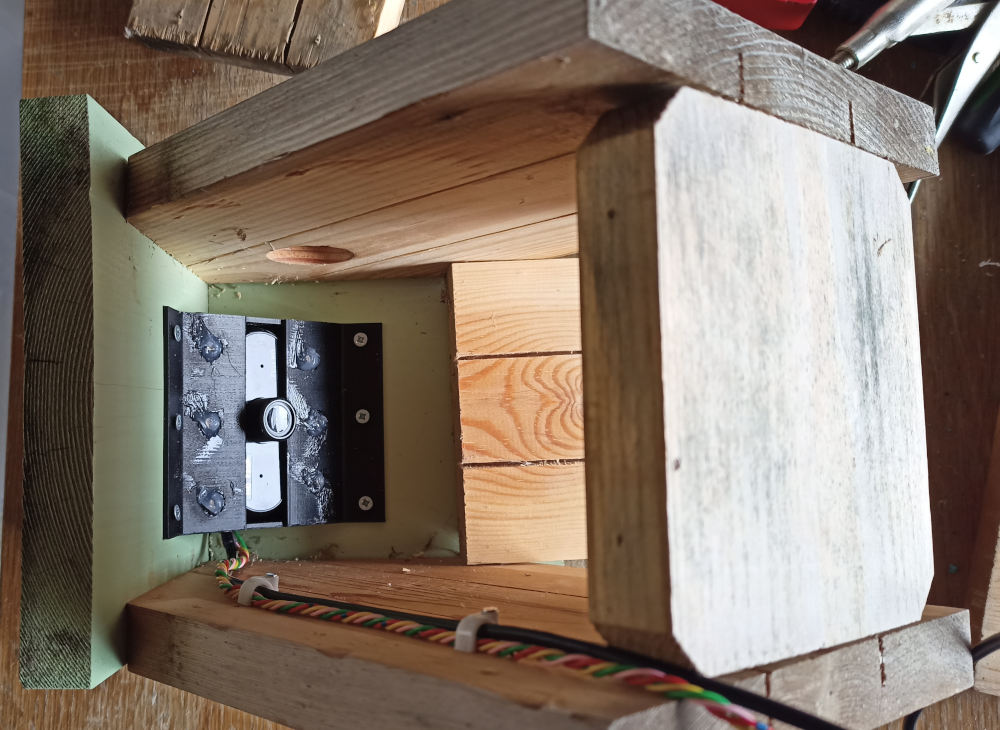
This is the camera and LED housing mounted in the bird box:

Looking up into the box with the mounting fitted.
Looking upwards into the roof of the box

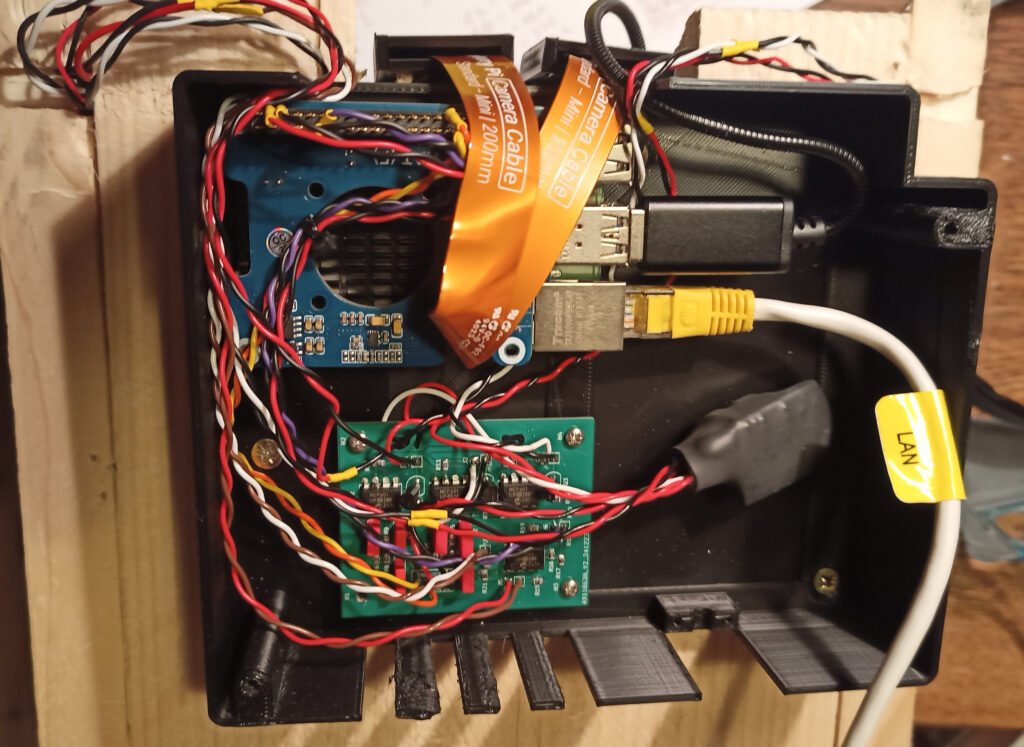
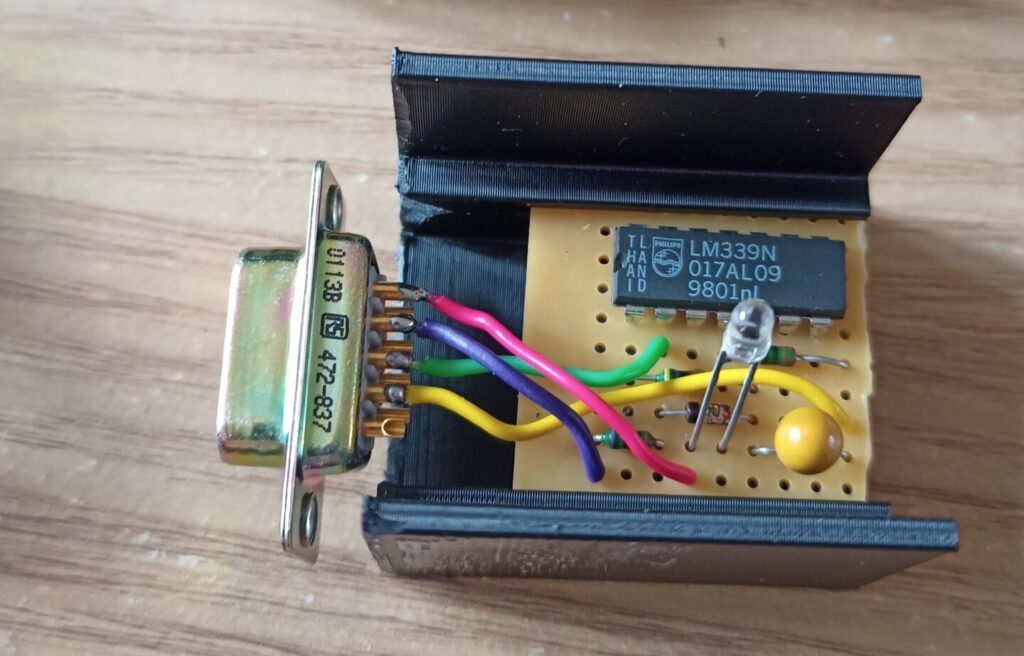
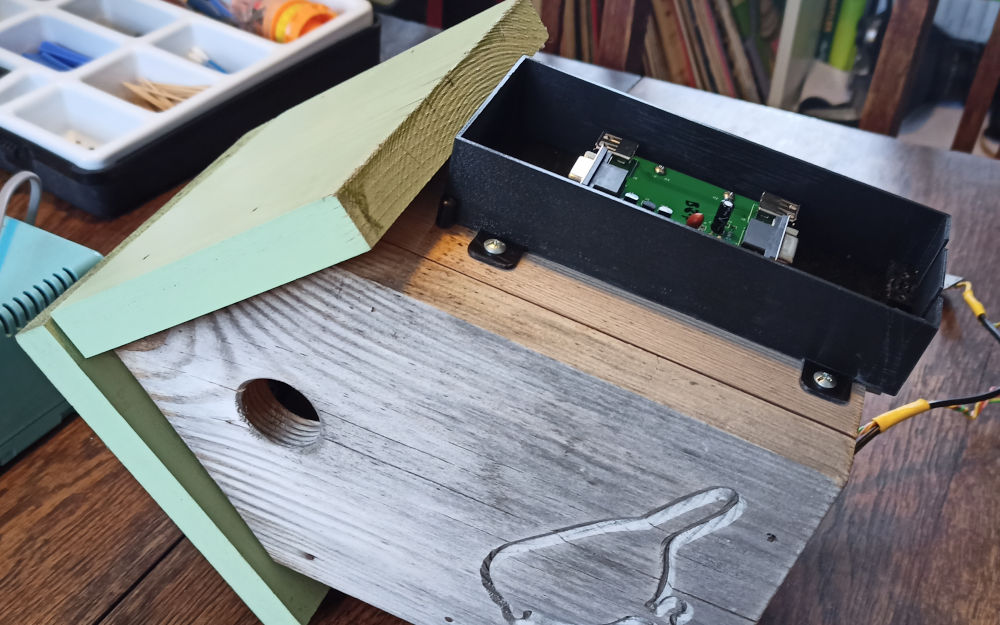
On the outside is the 3d printed box which holds the interface to the cable that goes into the house and the drivers for the LEDs. I actually had a proper PCB made with a D/A for the microphone but I never wired it up because I’m lazy. That’s why there is no sound. Sorry.

The interface box with unused D/A.

The LED controls and USB for the camera share a length of CAT-5 cable into the house, where they plug into the Raspberry Pi, which has an ethernet connection to the router.

And that’s the hardware. Total cost probably around £75, including custom made PCBs, which were ridiculously cheap. I mean like stupidly cheap – around £5 for 5 PCBs, including delivery from China. Anything clever is done in software, including stuff to improve the performance of the (frankly substandard) parts I used. Next year I’ll replace it with decent kit, including a camera that isn’t shit.

Coming up next… The software

Ubuntu 20.04 LTS Login Loop – Fixed!

I have just upgrade 18.04 to 20.04, which went fine. But when I tried to log in, it would just dump me back at the login screen again. Looking through the logs I saw the line

(EE) xf86OpenConsole: Cannot open virtual console 7 (Permission denied)

The permissions for /dev/tty7 were fine. Various pages suggested solutions like removing .Xauthority, editing /etc/X11/Xwrapper.config, re-configuring gdm3 or uninstalling and reinstalling gdm3 and ubuntu-desktop-simple. This place has got loads that didn’t work for me.

Anyway, long story short – I noticed that there was a big delay logging in to a console. Sometimes this can be because it’s trying to mount a remote filesystem with NFS and timing out. I had 4 entries – two of which were for a computer which was turned off. They both had the “noauto” flag set, meaning they shouldn’t be mounted automatically but they were still messing up the login procedure. Commenting them out fixed the problem and I could log in normally.

Abusing Public WiFi Access Point Protocols for Fun and Beer Measurement (Raspberry Pi)

This is a little sub-project of what I’ve been working on recently – a hideously over-engineered Raspberry Pi-based system to measure the amount of beer left in the kegs in my keezer.

Normally I would simply set up a web server on the Pi and have it on the home network, so I could see the levels remotely. The problem is that the routers are all inside the house and the Pi is in the garage, invisible to them all thanks to the 2 external walls between them. I needed some way to read out the beer levels on my phone – after all, walking up to something and looking at the level gauge is so last millennium.

So – Bluetooth or some sort of ad-hoc Wifi thing? I like to re-use stuff I’ve got lying around in drawers, so the solution seemed to be an old WiFi dongle that was gathering dust. And Bluetooth is awful. Setting up a Pi as an access point is fairly well covered on the internets, but this is a bit different in that we don’t want to forward traffic onto our network like an access point – not that it could connect anyway, being out of range. I also didn’t want to install a web server on the Pi. It’s only a Pi 1 model B, so sticking Apache and PHP on it might be asking a bit much – especially when you can do it all with one command and a small BASH script.

So the cunning plan was to take advantage of a feature of public access points – the ones that show you a registration page for you to fill in with fake info.

When you connect to a public WiFi hotspot your device tries to load a page on the internet using non-SSL http. It might be any page (captive.apple.com/ seems to be popular), but it will be a web page that the device knows should exist and if it loads, your device knows the internet is working.

A public access point intercepts the page request and, rather than forwarding it, sends a 30x redirect HTTP response back to the device – basically hijacking the request and spoofing the reply. Your device then loads up the page it has been redirected to and displays it as a sign-in page.

It is this mechanism that I used to show the keg levels on any phone, just by connecting to the Wifi. This is how to do it if you want to do something similar. I’m assuming you SSH on to a Pi connected with an ethernet cable to your network, and you have a Wifi dongle hanging out of its USB port. In all likelihood they will be eth0 and wlan0 respectively, so I’ll use them.

wlan0 is going to use a different range of IP addresses from the ones used by eth0, so edit /etc/dhcpcd.conf to manually assign an IP address to the wlan0 interface. Add this at the bottom (comment out any existing definition for wlan0):

interface wlan0
    static ip_address=192.168.4.1/24
    nohook wpa_supplicant

Next we need to install hostapd to run the hotspot and dnsmasq to sort out assigning IP addresses to devices that connect.

sudo apt-get install hostapd
sudo apt-get install dnsmasq
sudo systemctl stop hostapd
sudo systemctl stop dnsmasq

The second two commands disable the services we just installed so we can edit config files before starting them again.

Create the file /etc/dnsmasq.conf and put this in it:

interface=wlan0      # Usually wlan0
dhcp-range=192.168.4.2,192.168.4.20,255.255.255.0,24h
address=/#/192.168.4.1

This tells dnsmasq to assign the range 192.168.4.2 – 192.168.4.20 with a netmask of 255.255.255.0 and a lease time of 24 hours. The third line tells it to return the server address for all domain lookups that aren’t in /etc/hosts, i.e. all of them. When dnsmasq restarts it will look at this file and load up the config information.

Now to set up hostapd. Create /etc/hostapd/hostapd.conf and put this in it:

interface=wlan0
driver=nl80211
ssid=Your SSID here
hw_mode=g
channel=7
wmm_enabled=0
macaddr_acl=0
ignore_broadcast_ssid=0

It’s pretty obvious what is happening there, other than some of the technical bits; wmm_enabled is something to do with packets (no idea what, though), macaddr_acl tells it to whitelist all connections and ignore_broadcast_ssid tells it to broadcast the SSID – set it to 1 to hide it. There is no WPA password or setup, obviously. Change the SSID to something hilarious.

Now you need to tell hostapd where to find the config file when it starts. Edit /etc/default/hostapd and add (or uncomment and edit) the line:

DAEMON_CONF="/etc/hostapd/hostapd.conf"

We have now set up our access point. Start dnsmasq and hostapd again:

sudo systemctl start hostapd
sudo systemctl start dnsmasq

If there are no errors, your AP should show up in the list of APs on your phone, laptop etc. Try connecting to it – it should connect but you won’t be able to see the internet because there is no forwarding. One thing you can still do however, is connect to SSH on the Pi. You really don’t want any ports other than 80 visible from an unsecured AP. We’ll use iptables to set up a firewall and do the test page hijacking.

sudo iptables -A INPUT -p tcp -i wlan0 --dport 80 -j ACCEPT
sudo iptables -A INPUT -p tcp -i wlan0 --dport 53 -j ACCEPT
sudo iptables -A INPUT -p tcp -i wlan0 -j DROP
sudo iptables -t nat -A PREROUTING -p tcp -i wlan0 --dport 80 -j DNAT --to-destination 192.168.4.1:80

The first two tell iptables to allow through connections on port 80 (HTTP) and 53 (DNS), the second tells iptables to drop all other TCP connections from wlan0. The third redirects any connection with a destination port 80 (regardless of the IP address) to the Pi at IP address 192.168.4.1, port 80, for our server to handle. If you are a bit confused about how iptables work, this flowchart will either clear things up or make it more confusing. Basically there are 4 tables – filter (default if no -t switch), nat, mangle and raw which each contain “chains” such as INPUT which are the instructions on how to route traffic. It’s a vast subject and I learned just enough to work out the 3 lines above. There are other guides that go into more details.

One thing to do at this point is make it so that the iptables configuration is not lost when the system is rebooted. This command saves it to a file:

sudo iptables-save >/etc/iptables.ipv4.nat

To reload the configuration on boot put this in /etc/rc.local

iptables-restore < /etc/iptables.ipv4.nat

So, moving on to the web server. I’m using socat and a bash script. socat is one of those amazing Linux tools that is impossible to explain to a layperson. “What it does is, it takes data from one place and puts it in another but it’s more complicated than that…” and so on. Best just to tell them it’s the computer equivalent of magic, before their eyes glaze over and they start thinking about feigning an illness in order to escape. We are going to use it to pipe data from an internet port to a script and back again. Incoming text from port 80 is sent to the script on stdin and anything written to stdout gets sent back to the port. It’s easy enough to set up with this command:

sudo socat TCP4-LISTEN:80,reuseaddr,fork EXEC:"/home/your_path_here/server.sh >/dev/null" 2>/dev/null &

Obviously change “your_path_here” to where you are doing all this stuff and put this line in /etc/rc.local if you want it to start automatically on boot. The command tells socat to listen on port 80 and then fork off the script when there is a connection. The script referred to as /home/your_path_here/server.sh is this:

#!/bin/bash

PAGE_NAME="kegs"
FOUND_URL="http://1.1.1.1/$PAGE_NAME"

request=""
while read -r  -t 5 line; do
  if [[ ! -z "${line:-}" && $line == *[^[:cntrl:]]* ]]; then
    if [[ ${line:0:4} == "GET " ]]; then
      request=$(expr "$line" : 'GET /\(.*\) HTTP.*')
    fi
  else
    break
  fi
done

if [[ "$request" == "$PAGE_NAME" ]]; then
  printf "HTTP/1.1 200 OK\n"
  printf "Content-Type: text/html\n\n"
  cat index.html	# Show this as a registration page.
else
  printf "HTTP/1.1 302 Found\n"
  printf "Location: $FOUND_URL\n"
  printf "Content-Type: text/html\n\n"
  printf "Redirect to <a href=\"$FOUND_URL\">$FOUND_URL</a>\n"
fi

That’s pretty dinky for a web server, huh? Don’t forget to change permissions of server.sh with chmod 755 server.sh. Rename PAGE_NAME and FOUND_URL to whatever you want. Note that because we are grabbing all port 80 traffic coming in on wlan0, it doesn’t matter what you put for an IP address – it’ll all go to our server. The first block of code reads the HTTP request coming from the device, which will be saying something along the lines of:

GET / HTTP/1.1
Host: captive.apple.com
Accept: image/gif, image/jpeg, */*
... and so on

The script ignores everything except the GET /… part, from which it extracts the page name, if any. It won’t match (unless the test page is called “/kegs” – unlikely), so it will respond with the redirect code 302, to send the device to “/kegs”. The device sees the redirect, thinks it’s for a registration page and loads 1.1.1.1/kegs. This time the script sees that /kegs has been requested, sends a 200 OK code and the contents of index.html, which the device displays. My beer measurement system generates index.html as a page showing how much is left in each keg.

As a useful tool with which to quickly see the levels of my kegs without any fuss, this is rubbish, quite frankly. But then the whole raspberry-pi-based-keg-measurement thing could be replaced with cheap mechanical bathroom scales, so I might as well go all in on the pointless technology.

Updated 10/6/2020 : Improved the firewall rules.
Updated 18/2/2021 : Improved DNS rules.