Category: Destroy It Yourself

  • Beer Hutch!

    Young William and James were the luckiest boys in Cambridge.  Their father, a brilliant inventor, had built them their very own beer hutch! Fun and adventure was never far away, thanks to their thermostatically heated shelter which was large enough to hold a pressure keg and lots of bottles.  Actually, fun and adventure were some considerable distance away, and not getting any closer, thanks to their father not giving it to them and putting his beer in it instead.  They would only have used it to have zany adventures with an ironic twist at the end anyway, and I’d rather drink beer thanks.

    But why a beer hutch?  Home brew needs to be stored at the correct temperature, which is less than the inside temperature of a house, but more than the bloody freezing temperature it currently is outside; I don’t want to suck it like a lolly.  An outside cupboard or garage would normally be fine but unfortunately, at some point in its life, our Victorian terraced house had had its outside toilet and coal bunker knocked down and turned into a big kitchen.  With no thought as to how future residents would store their homebrew at the correct temperature – not very forward-thinking, eh?  For a while my beer lived outside, wrapped in a heated underblanket (found in a skip – very few stains on it but a broken switch), with its temperature controlled by a home-made (mainly from scrapped parts) thermostat:
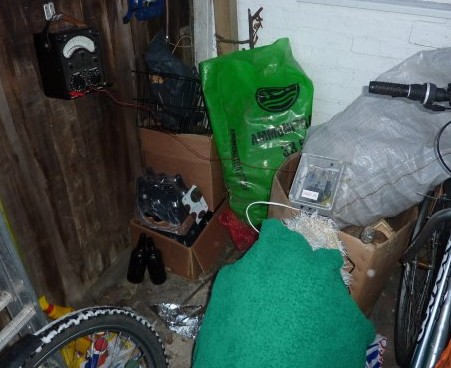
    There she is, huddled under her green blanket.  Just above is the control electronics and hanging on the fence is the temperature readout:
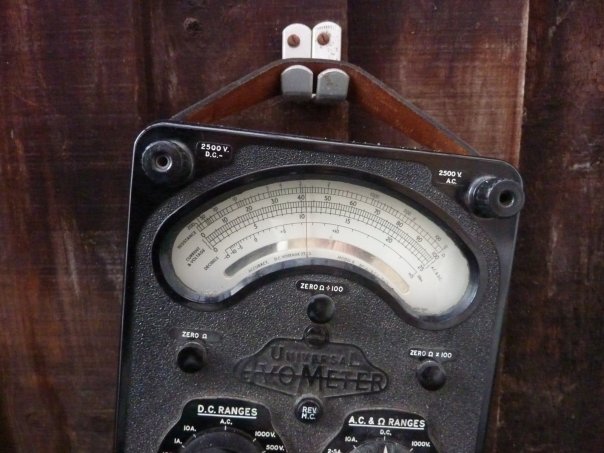
    10.5 Degrees – just right.

    This is all very well and good, but it’s a right pain actually getting the beer out – you have to lift up all the layers to get to the tap and take everything off to give her a puff of CO2.  Also, what do I do when I’ve got 40 bottles of beer as well as the keg?  So I needed a little beer hutch to keep the precious liquid at the optimum temperature.  Luckily, they were chucking out a load of under-bench cupboards from one of the labs at work:

    Pretty tatty, but it’s built like a brick shithouse and it just needs a top, door, stronger back, insulation (walls and door are a chopped up Tesco Value duvet with skip-found insulated board top and bottom) and the heater blanket.  A couple of nights later…

    Lots of insulation and the heated blanket installed.  What does it look like from the outside?  In a word – tasty.

    The sharp-eyed might notice that the door is a) the wrong colour, b) the wrong size, c) hung wonky and d) upside down, but when you are hanging upside down by your feet from the edge of a skip, you can’t be choosy about the colour, type or which side door it is.  It shuts.  It opens.  It fulfills its purpose.

    And now my beer is in her lovely new, hand-crafted home.  The end result:

    Night night precious beer.
  • Screwing in skirting

    Tape Measure

    With the words “screwing” and “skirting” in the title, this post will no doubt produce some interesting search terms in the logs but sadly, it’s not as exciting as it sounds. I am, of course, referring to the stuff that goes round the bottom of your walls and the best way of attaching said stuff. Don’t worry sir, the next link down will probably about transvestite sex – just hit the “Back” button on your browser. Bye!

    Right, those that are left are now either interested in DIY or twisted enough to become sexually excited at the thought of wooden planks. If it’s the latter then I am seriously impressed and I take my hat off to you for developing a truly original perversion. You must spend a lot of time in the B&Q toilets.

    Now, I’m not going to cover the nitty gritty of getting your skirting to line up nicely with lovely mitred corners; I can’t even do that myself so there’s no point trying to teach others. Being useless at getting bits of wood to line up is why decorator’s caulk was invented. This is purely about the mechanics of getting it attached to the walls. “No More Nails” I can hear you thinking (no, of course I can’t really), and to some extent you are correct. If you’ve got lovely flat walls and if you’ve got lovely flat wood and if you don’t ever want to take it off again. On the other hand, if you live in a Victorian house there won’t be a flat wall in sight and the plaster will consist of sand and pebbles, bound with dried-out spit. You will probably also find that your skirting is slightly warped or, if you’ve bought it from B&Q or Homebase, bent like a fucking corkscrew. By screwing it into the wall, you can fit the wibbly wobbly line of the walls and unbend the wood as you go. You can also take it off easily, should you want to fit extra sockets, paint neatly under the skirting board line or if you get a sudden urge to dress it up in a negligee and sleep with it, you sick, sick person. So here is my method to get those screws wanged in at exactly the right position and at a phenomenal rate.

    You will need:

    • Three cordless drills. Well, you don’t need three but you will be using 2 drill bits and a screwdriver, so the more drills you have the quicker it’ll be because you won’t be swapping bits all the time.
    • Red rawlplugs. Probably red. I’ve found the ones for size 8-10 screws always are.
    • Screws – Size 8, 2″ long. Or longer if you’ve got nasty plaster. Size 10 if you need more force to unbend the wood.
    • A 6mm wood drill bit and a 6mm masonry drill bit. Check the rawlplug to make sure you have the correct masonry drill bit. Use the same wood drill bit size as this one.
    • A hammer (Oh yes!)

    Method:

    1. Put the skirting on the wall, where you want it fixed.
    2. Drill through the skirting with the wood drill.
    3. Make sure the skirting is in exactly the right place and then drill into the wall with the masonry drill, through the hole you just made in the skirting.
    4. Put the rawlplug into the hole in the skirting. Screw a screw into the rawlplug by a 1/2 a turn or so – just enough to hold it in place.
    5. Tap the screw with the hammer to bosh it and the rawlplug through the skirting and into the wall. There should be about a rawlplug’s length of screw sticking out when the screw/plug combination hits the bottom of the hole.
    6. Screw the screw in.

    The depth of hole you drill in the wall depends on the length of your screws, but you can estimate it to start with by holding a screw up to a bit of skirting, seeing how far it sticks out the back and seeing how far up the drill bit you need to go to go that deep.

    If you find that the screw stops going in before the board is tight to the wall, and just spins round in a pathetic way (“pathetic” is an accurate description – you wait until it happens to you), your hole might not be deep enough causing the screw to bottom out. That last phrase should get a few more perverts here. Or it could be that you aren’t inserting the rawlplug deep enough into the wall for it to reach anything solid to grip in. Try using a longer screw and drilling further into the wall – until you drill into the brick.

    With three drills and a mouthful of screws and rawlplugs, you can get your badly-cut, wrongly sized bits of skirting screwed cock-eyed onto a wall before your wife can say “christ, look at the state of that – why the hell couldn’t we have got in a proper carpenter, you tightwad?” Good luck!